Thursday, December 20, 2007
Simple look and feel changes in SharePoint 2007
1) Click on the site action and select the site settings
2) Under the Look and Feel you can see Site Theme in the option, click on the Site Theme
3) Some themes will be listed, which is preload in the SharePoint. By default the default theme is selected.
4) Select the theme you want to apply and click the apply button
5) Thus the them applies to the site successfully
How to change the logo in the header for SharePoint 2007 site
1) In the left navigation panel you can see the view all site content, click on that and continue
2) Under the Document Libraries you can see a library named images available. If not create one as per you needed.
3) Upload the Logo image into that image document library
4) After uploading right click on the image file in the document library and copy the shortcut of the logo file
5) Now go to site actions site settings
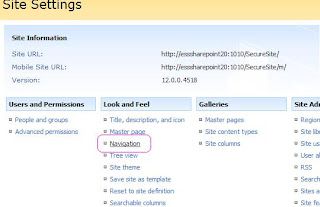
6) Under Look and Feel click on the Title, Description and Icon
7) In the Logo URL and Description, in the URL text box paste your copied path
8) Click ok and continue. The logo is successfully changed
Enabling Drop down menu for multi level in SharePoint 2007 sites Top Navigation bar
Open your SharePoint site in SharePoint designer and navigate through the folder and open the default.master page.

Monday, December 17, 2007
Office communication server 2007 Enterprise Edition
Office communication server 2007 Enterprise Edition
Deploy pool in consolidated topology:
Deploys an enterprise pool and install all enterprise edition components.
10 steps to be followed
Step 1: Prepare active directory
7 steps to be followed
Step 1.1: Prep Schemas
Step 1.2: Verify replication of schema partition
Step 1.3: Prep Forest
Ref: http://support.microsoft.com/kb/322692
Step 1.4: Verify replication global settings and global catalog
Step 1.5: Prep current domains
Step 1.6: Verify replication in the domain
Step 1.7: Delegate setup and administration
Step 2: Create enterprise pool
Prerequisite: Mini mum SQL 2000 with SP 4 or SQL 2005 with SP1
Ref: http://www.microsoft.com/downloads/details.aspx?FamilyID=cb6c71ea-d649-47ff-9176-e7cac58fd4bc&displaylang=en for SP1
Step 3: Deploy Hardware Load Balancer
Step 4: Configure pool
Step 5: Add server to pool
Prerequisite: MSMQ requirement add this component.
Step 6: Configure Certificate
Sample Certificates: http://msdn2.microsoft.com/en-us/library/aa362729.aspx
http://msdn2.microsoft.com/en-us/library/ms751503.aspx
Step 7: Configure web component certificate
Step 8: Verify Replication
Step 9: Start Services
Step 10: Validate Server and Pool functionality
Configuring the Out of the Box Approval Workflow for a Document Library
To create a document library, go to all site content and click on the create button.
Now let’s check how the approval workflow can be configured with this document library.

Now you can see that the workflow has been started, says that In Progress.
When you logged in as assigned user credentials you can see the workflow task that should be completed by that user in the task list.
After approving it states that status is completed.
Friday, December 14, 2007
Create a simple WorkFlow For SharePoint 2007 using VSTS 2008


SharePoint 2007 Application Template
Windows SharePoint Services 3.0 Application Template Resource Center
The resources below provide information for getting the most out Application Templates for Windows SharePoint Services 3.0. These include an introduction to Windows SharePoint Services, information on learning the basics of application templates and working with SharePoint sites, and links to relevant guides and datasheets. You’ll also learn how you can customize application templates to meet your unique business needs.
More>>ASP.NET MVC - Sport Facility Booking system
The project relies on some external service providers. Thus accessing them via their API requires authentication. An API Key need to be su...
-
The project relies on some external service providers. Thus accessing them via their API requires authentication. An API Key need to be su...
-
"The server is configured to use pass-through authentication with a built-in account to access the specified physical path. However, II...
-
Excellent outcome by some of the Microsoft Technology community influencers. CAML.NET IntelliSense for SharePoint To build a SharePoint feat...


